DeFi Token Trading In Java Using The Kyber Network #1 - A KyberDAO Funded Tutorial
The tutorial will show you how easily you can access the Kyber Network out of a Java Application in order to trade crypto tokens.

The tutorial has implemented the primary trading scenarios:
-
Convert Ether to a Token
-
Convert a Token to Ether, as well as
-
Convert a Token to a Token.
The tutorial was established as part of the
KyberDAO “DAOstack” experiment. Therefore the first three sections will give an overview of this experiment and the collected experiences.
If you are just interested in the Java Tutorial, scroll down to the relevant section.
About DAO’s and the DAOstack
As part of my research journey into the technology trends of the emerging world of decentralization, I started recently to investigate into Decentralized Autonomous Organizations (DAO’s) and their impact on the future working model. My first article to the topic I published on Medium under the title “
Death of the Corporation”, which exploits the benefit of such a new way of working.
It’s a new series which I started after my initial one - published in Q4 2018 - about the emergence of Polkadot (
Medium Polkadot Hello World series). In a way, my own bootstrapping into the crypto space.
Decentralized Autonomous Organizations (DAOs) have seen a recent resurgence in activities, after being slashed in 2016 when the infamous hack of “The DAO” led to the ETH-ETC hard fork.
Circle Research provides in their excellent
Q2-2019 crypto retrospective, the following definition:
“DAO’s are internet-native organization that can execute transactions autonomously based on a predefined set of rules enocded in a transparent, trustless platform (i.e. blockchain). All DAO’s manage the allocation of valuable internal capital (e.g. funds to be issued to open source network developer) without relying on hierarchichal management. DAO shareholders (e.g. contributors, members, token holders etc.) at any level can submit and vote on any proposal, but don ot take part in the execution prossed (i.e. the delivery of funds)
…
Since no centralized entity or individual controls a DAO, these organizations can effectively manage the allocation of funds or member-approved decisions in open, distrubted networks, which can be ideal for crypto networks and associated applications”.
That brings in
DAOstack - the so-called operating-system for collective intelligence - a blockchain platform (
Alchemy) for running Distributed Autonomous Organization on top of it backed by the so-called Holographic consensus.
The consensus protocol helps DAOs prioritize the most value-aligned proposals, even with million members. The goal of the consensus protocol is to incentivize people to correctly predict what DAO’s care about (its mission) , and lets DAOs make good decisions without requiring everyone to vote on everything (
DAOStack Slide Deck).
In the words of Matan Field (founder of DAOstack)
“A DAO is orientable and super-scaleable” (
ETHCC Keynote Videos)
DAOstack was experimenting in 2018 in an Alpha release and went in a public Beta with their product called “
Alchemy Earth” on the Ethereum mainnet opening it up to communities and organizations, which want to create DAO organizations.
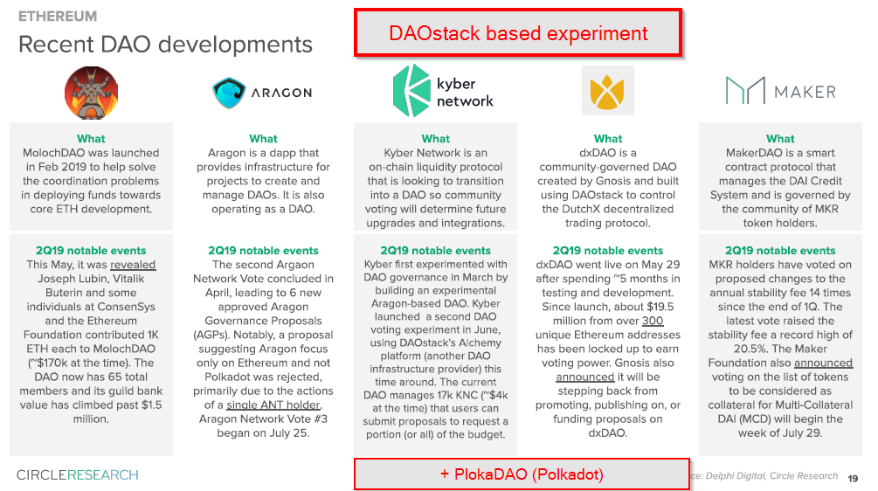
There are various DAO experiments established by decentralized networks and applications. Two of them namely the Kyber Network, as well as Polkadot were basing their experiment on DAOstack.
My credo when investigating into new technologies is to try it out by myself (“eat your own dog-food”) and not just looking at it from a top-down angle. I’m an avid hobbyists programmer and established in the recent years a
subscription based blogging product based on Evernote. Moving forward I was now looking out for some tech work in the Ethereum space to kick-start my decentralized programming activities.
So these experiments were ideal for me to test the waters and come up with two proposals which were decided either by the Kyber Network -or the Polkadot community. Finally, both proposals got approved by the respective DAO’s and delivered, this article concentrates on the KyberDAO proposal.
About Kyber Network and the KyberDAO
Kyber Network was an early-,over which onboarded a DAO (the so-called
KyberDAO) to Alchemy Earth.
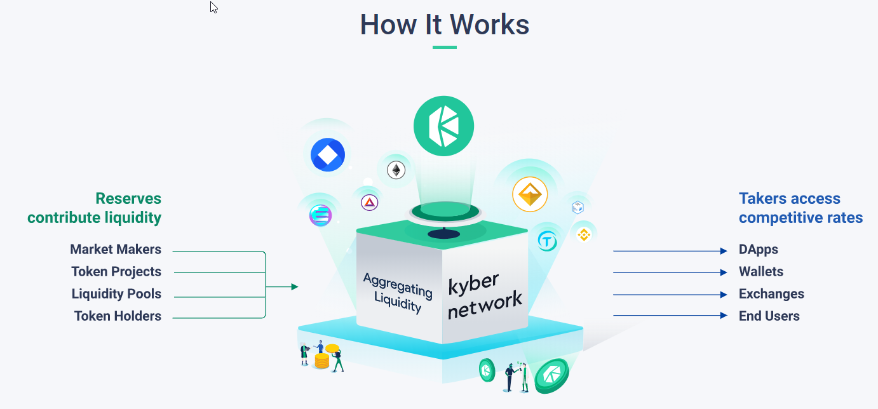
Kyber Network is an on-chain liquidity protocol that aggregates from a wide range of token reserves and powers instant and secure token exchange in any decentralized application.
It’s a well-known Ethereum based platform in the new world of
Decentralized Finance Applications.
Source:
Kyber Network
The Kyber Network allows you to exchange Ethereum based token(s), similar to a traditional foreign exchange trade which allows you to exchange fiat currencies. The difference is that there is no central exchange involved at all! The underlying base currency is Ether (ETH) and not any fiat currency.
As part of “
KyberDAO” community experiment, the network launched in June their DAOstack based DAO (after a first experiment on the Aragon platform) and funded it with about 17,000 KNC (around $4500). Anyone from the community can submit a proposal with a fund request for a portion or the full amount of the grant (see
announcement).
So it’s an ideal test environment to request for a funded proposal in the context of my programming experience builds up. In a certain way, a win-win situation for me (Knowledge buildup) as well as the Kyber Network to get some code exposure to the Java community with my proposal.
The decision to invest my time into the Kyber Network was easy because the documentation of their platform from any aspect is just excellent It allows a newcomer to get an understanding of it very quickly.
From the
interface point of view
Kyber Network provides - besides the direct ABI smart contract- a RESTful API which gives users (without much smart contract knowledge) the ability to interact with their contracts. So the ideal starting point to kick start my programming in the Ethereum crypto space.
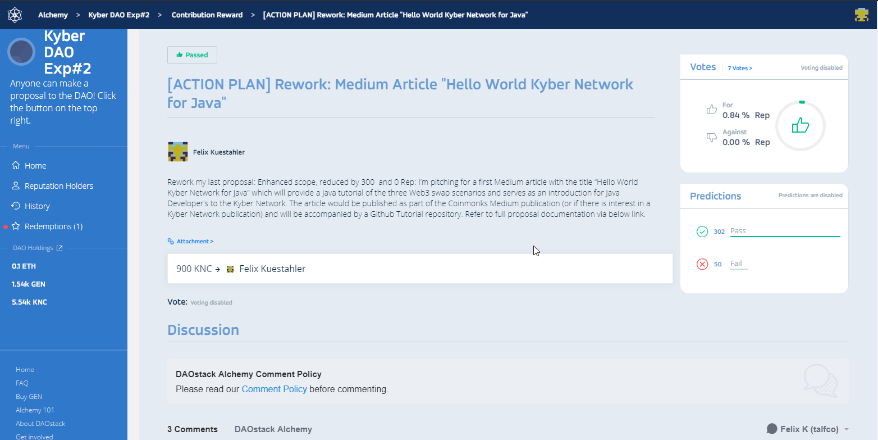
About my KyberDAO proposal
On Alchemy Earth in the KyberDAO section, I created a proposal with the goal
“To develop a Java Kyber Trading tutorial and publish the findings in a Medium article.”
The proposal itself - shows in the below screenshot of the Alchemy UI, is backed by a detailed document which is located
here.
To publish the proposal, you require a Metamask account and a minimal amount of Ether (some cents to pay for the gas fee, when proposal data is written to the blockchain). Refer to the following
YoutTube Tutorial of @eriktrodigues which walks you through all the necessary onboarding steps.
I was quite excited to see, what happens when a completely new-joiner request for some funding of its work in a DAO community.
My first proposal got well accepted by the community. There were some questions about the requested amount of funding, which may be normal in a contract negotiation.
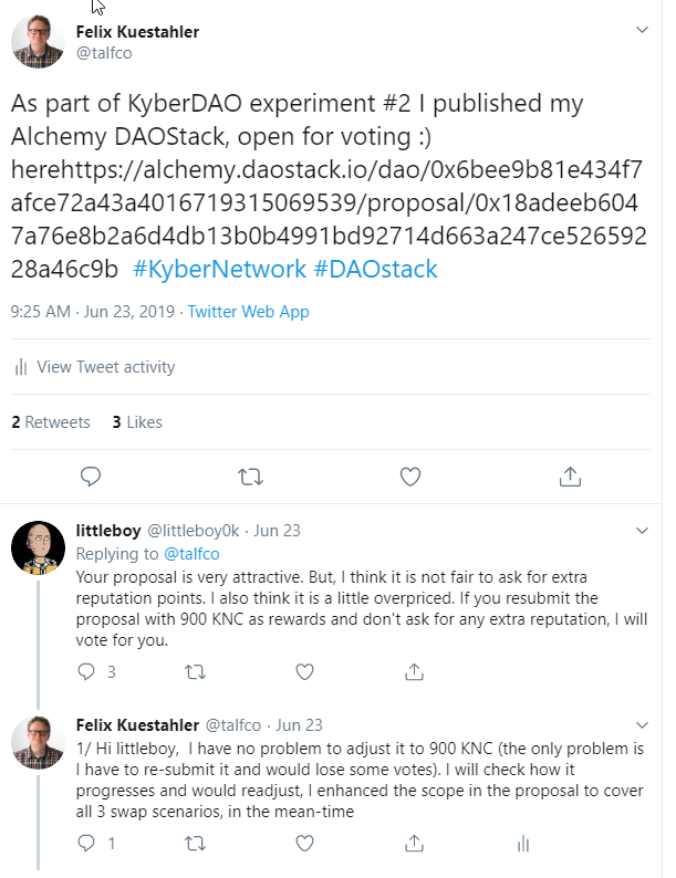
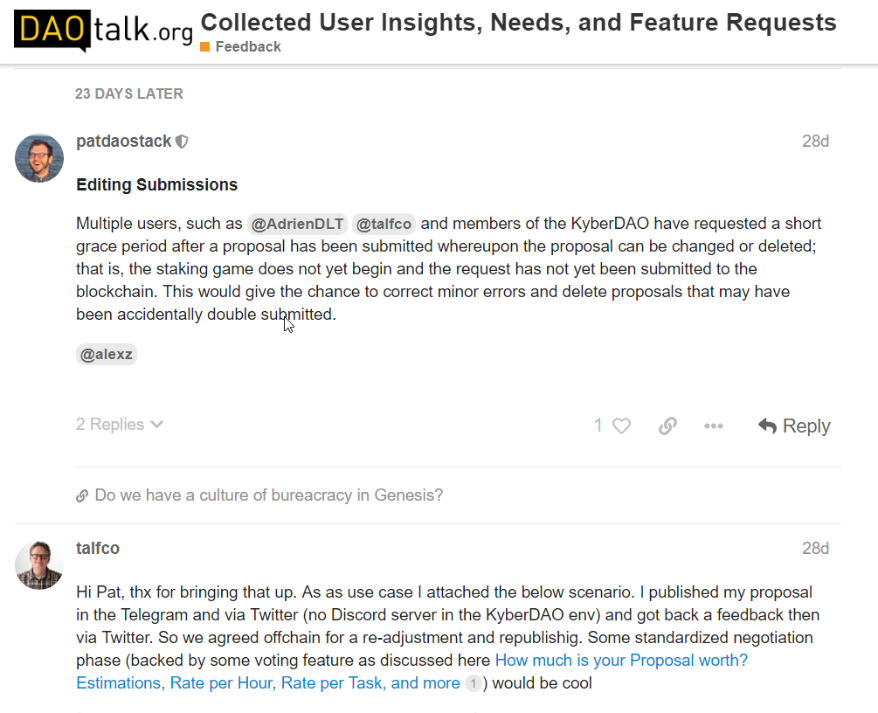
I decided to re-adjust the price, which required to re-publish a completely new proposal. This process is somewhat clumsy and results that two open proposals (not automatically linked to each other via a versioning number or similar) are in the system. From a UX point of view, it’s not immediately clear for a reviewer which proposal should be looked at. That may get confusing in case there are a large numberof proposals in the reviewing phase potentially with multiple version.
So I brought the problem up in the
DAOstack community forum
, which took up the feature request and kick-started a discussion around the topic. That speaks for the DAOstack community, which is open and very responsive to problems, features, and requests by its user.
About the Kyber Java Client Library
So now let’s dig into the Java client library for the Kyber Network, which I developed as part of my funding request. For a start, let’s run the Java Tutorial Application. Some the preparation steps.
Preparation Step: Get Java, Git and Gradle installed on your machine
Well it’s obvious to have Java and Git installed on your machine, additional the
Gradle build environment will be used, so that you can easily run the tutorial code from the command line. Install all these three dependencies on your machine.
Preparation Step: Create a Ropsten Test Wallet using the web3j command line utility
A web3j fat jar is distributed with each web3j release providing command line tools. The command line tools allow you to use some of the functionality of web3j from your terminal.
In our case, we have to create a test wallet on the Ropsten test network which is used for our token swapping scenarios.
-
There are various installers available to the command line tools
-
in case of Windows use the ZIP file distribution and extract in a directory
-
then run the web3j.bat file
Use the
wallet tools to create a wallet
-
‘wallet create’ will create a wallet.json file
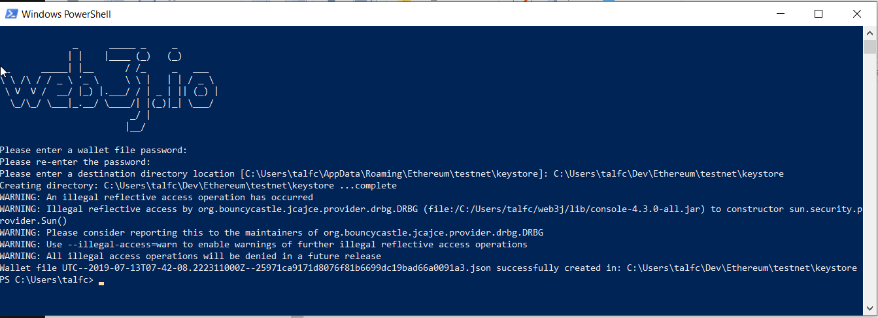
Check out the created Ethereum Address in the Wallet file and transfer some Ether to the address.
-
Use the https://ropsten.etherscan.io/ frontend to check your address, transactions and any other blockchain information.
-
The password chosen for the Wallet is required in our tutorial application to load the necessary credentials.
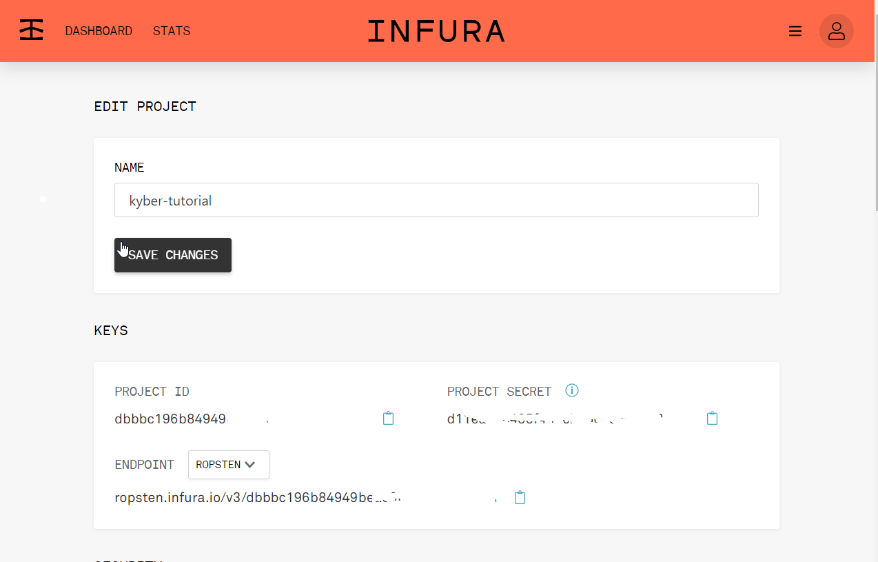
Preparation Step: Create an Infura Test Node Account
For writing the Kyber Swap transactions to the Ethereum blockchain you will require an Infura Test Node Account (obviously there are other possibilities, but that’s the most straightforward).
-
Get an account setup on Infura
-
Create a new project. You will use the Infura secret token (Project Secret) to connect to the Ropsten Test network.
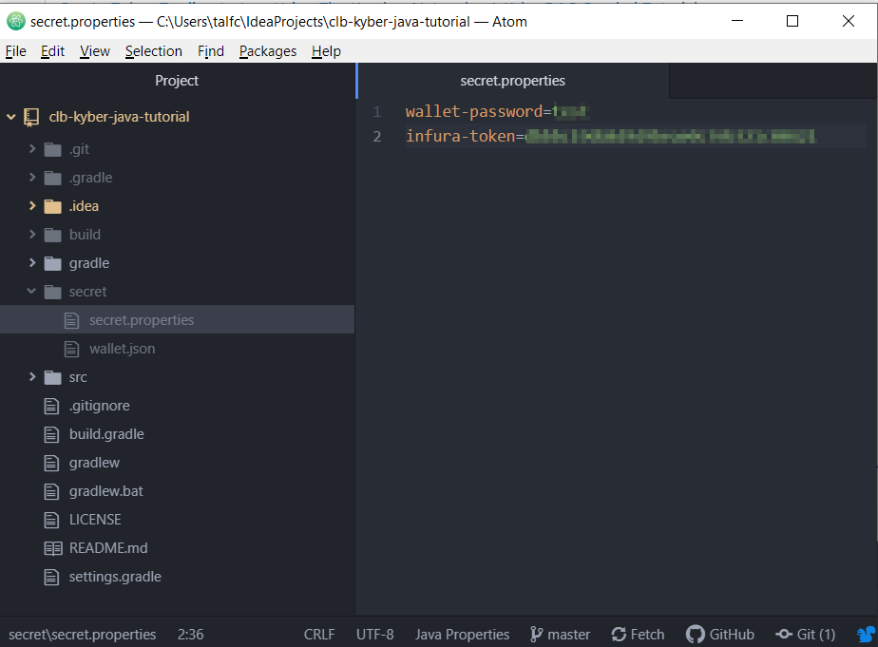
Preparation Step: Clone the github directory and create a secret directory
-
Clone the github directory with the tutorial: https://github.com/talfco/clb-kyber-java-tutorial
-
create a secret directory in the clb-kyber-java-tutorial and
-
copy the wallet.json file over
-
create a secret.properties file and add an entry for the wallet-password as well as your infura-token
Run the Tutorial Application
Just type
gradle run
which will kick off the tutorial application.
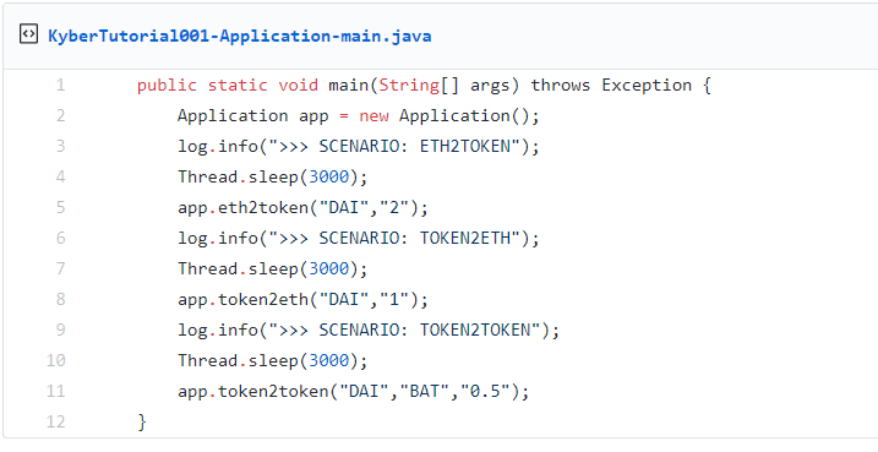
The application will call three methods:
-
First, it converts parts of your test Ether to two DAI tokens ( eth2token). The Kyber buy rate is required in order to determine the amount of Ether required.
-
Second, it converts back one DAI token to Ether ( token2eth). The Kyber sale rate is required in order to determine the amount of Ether paid out.
-
Third, it will convert one DAI token to one BAT token ( token2token). For this transaction, the buy rate, as well as the sale rate, is required in order to determine how many BAT tokens can be purchased
Check the console output for created Transaction Hashes and other information.
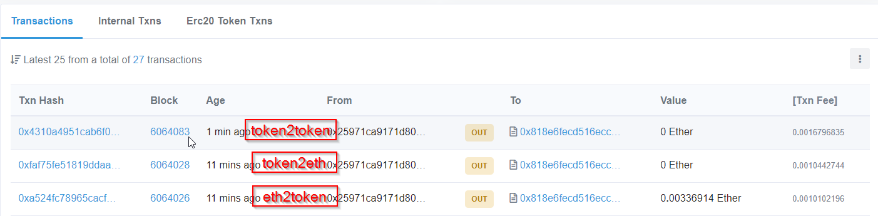
Ethereum Transactions Generated by the Tutorial
The tutorial application will generate 3 Ethereum Transactions, which you can checkout via the etherscan.io web application
-
https://ropsten.etherscan.io/address/<yourTestWalletAddress>
-
You will see three transactions, triggered by our three functions
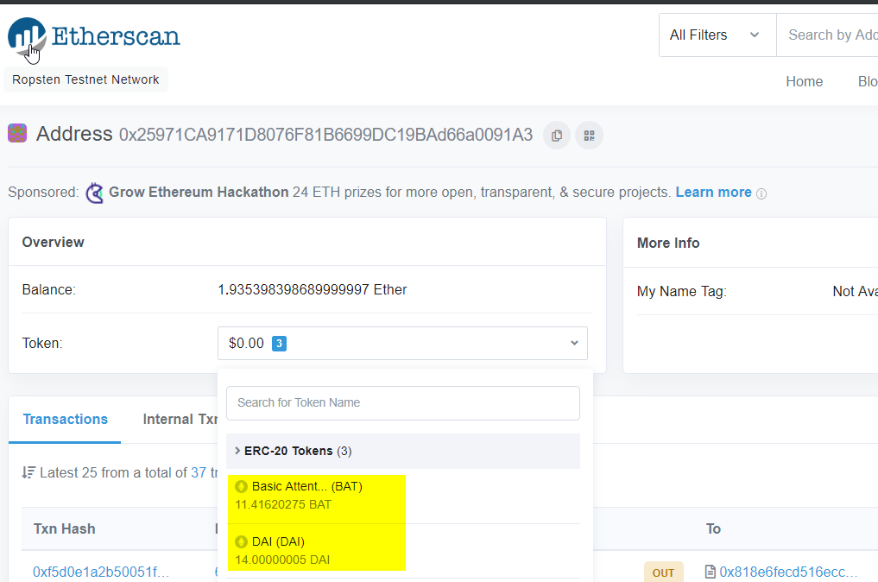
You are now also token owner on the Ropsten Network for DAI and BAT’s token. In the future you may use this simple Java Application to generate any kind of test token (as long as it is supported on the Kyber test network)
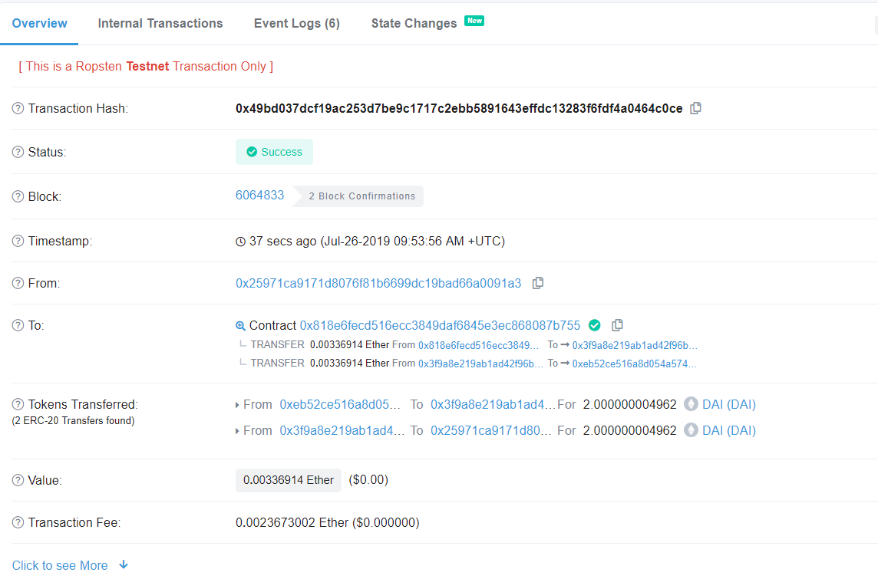
If you are a newcomer, I highly suggest that you study the detailed transaction information, which will give you a lot of insight son how an Ethereum transaction is built up.
As for example the screenshot below is the detailed transaction information from the
eth2token
conversion (2 DAI tokens bought). You could now drill down and explore the Kyber Contract which is involved in this transaction.
Implementation Aspects - Kyber API Functionality designed as web3j module
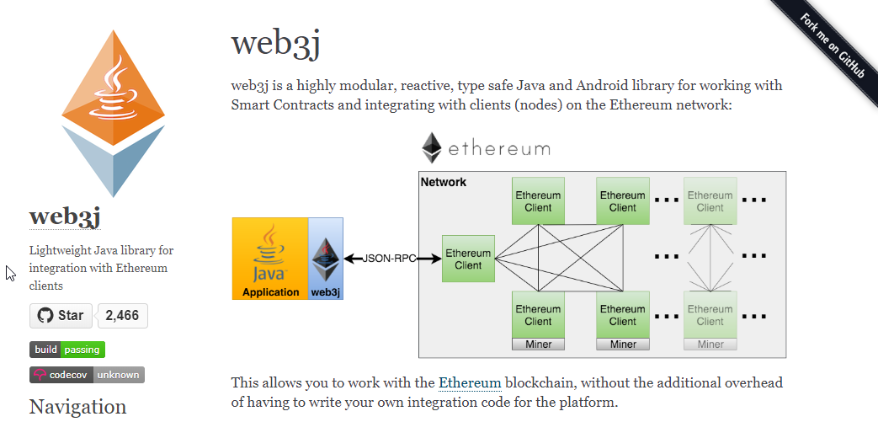
This tutorial is my frist Java programming exposure to Ethereum, so I was checking for a decent java base library for the Ethereum network. One well-known is
web3j
from the Web3 lab. It’s mainly focusing on the Smart contracts (which is mainly shielded by the Kyber Restful API) and will have the necessary tool kits to load wallet credentials and sign transactions, which plays a role as well in the Kyber Restful API
The introduced java classes and interfaces are inheriting from the core classes of web3j and are implemented in a similar way. This allowed me to leverage a lot of code from web3j on the one side; on the other side developers using web3j will find similar patterns.
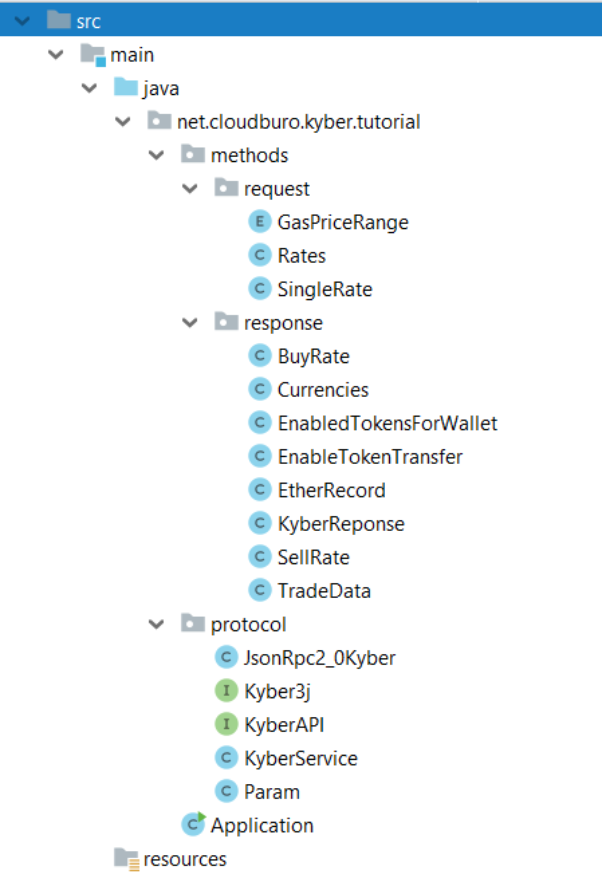
In order to be web3j compliant (which is built around JSON-RPC interfaces), I introduced a
JsonRpc2_0Kyber
class
which acts as a protocol converter and prepares the request for the Kyber REST API.
The Kyber Java API interface supports the following functions.
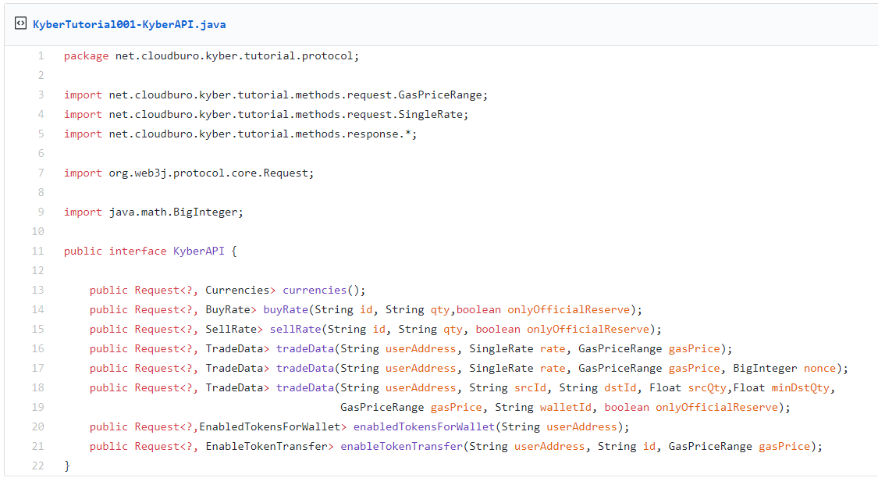
As one can see the major part is Java strong typed. JSON data requests are automatically converted to Java Classes via
Jackson XML
parsing support.
A second article will deep-dive into the various design aspects to the built client library.
Trading Scenarios Code Excerpts
To conclude the tutorial; the code sequence of the three scenarios is provided. As you can see the code is quite compact, readable and understandable. If you would check out a basic web3j Ethereum transaction sample, you would see the similarity of the code.
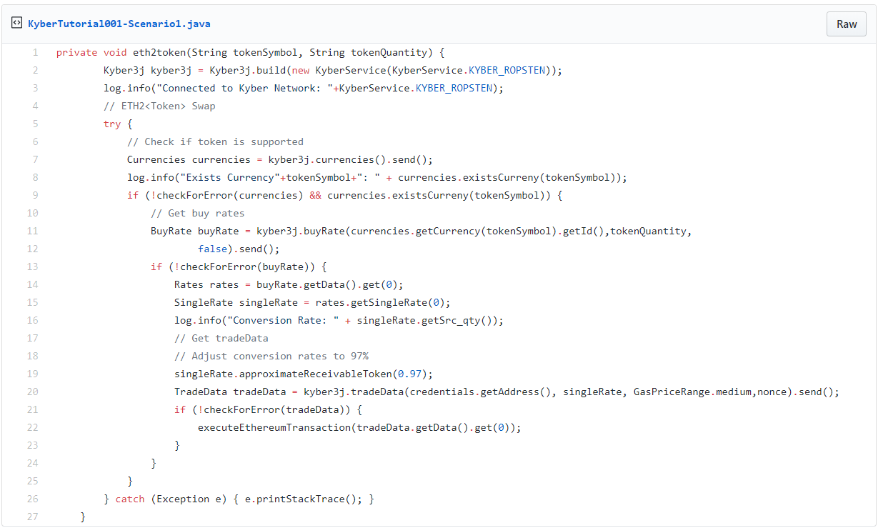
Scenario: ETH2TOKEN
Just realize how easy it is to swap tokens on Ethereum using the Kyber API’s!
Scenario: TOKEN2ETH

Scenario Token2Token
Final Point
I hope this tutorial was useful for you, so get the code loaded into a Java IDE and start playing around with it. You will realize how easy it is to execute and swap token transactions on the Ethereum network.
As already mentioned, I plan to come up with a second article, which explains the java client library and its implementation strategy in more detail.
comments powered by Disqus