Python Tutorial: Retrieve a list of Swiss Government Members From Twitter
The tutorial will show you how to extract a list of tweeting Swiss Government Members via the Twitter API. The extracted data will be put into a Panda Dataframe and then visualized via the powerful Plotly package.

The result will look as follows:
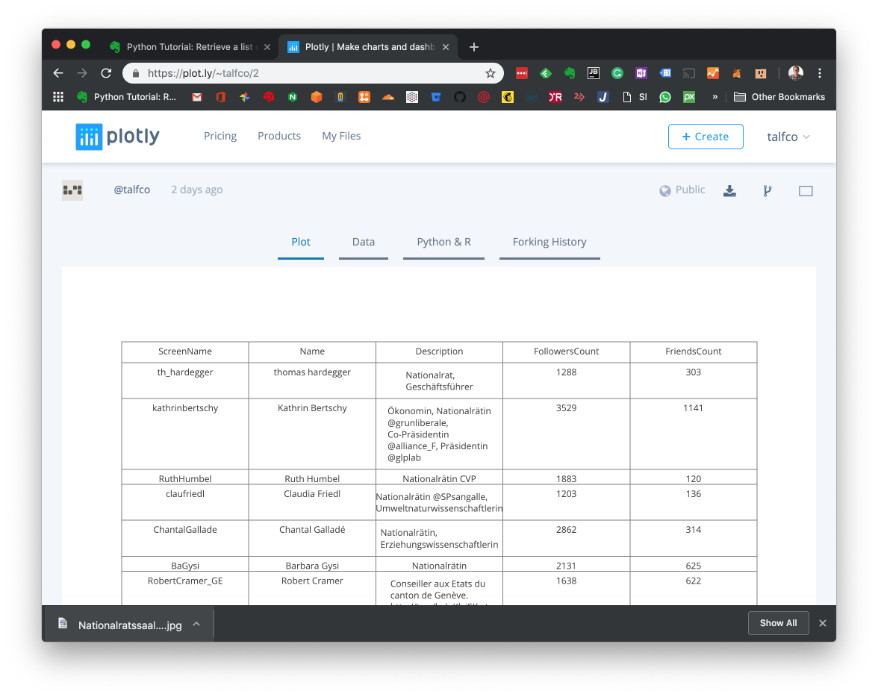
Interested in the Swiss Government system? Head over to
Ten Things you need to know about the Swiss Political system
.
Where to get the data from?
The twitter account
SoMePolis maintains a list of Swiss government members, who have a Twitter account.
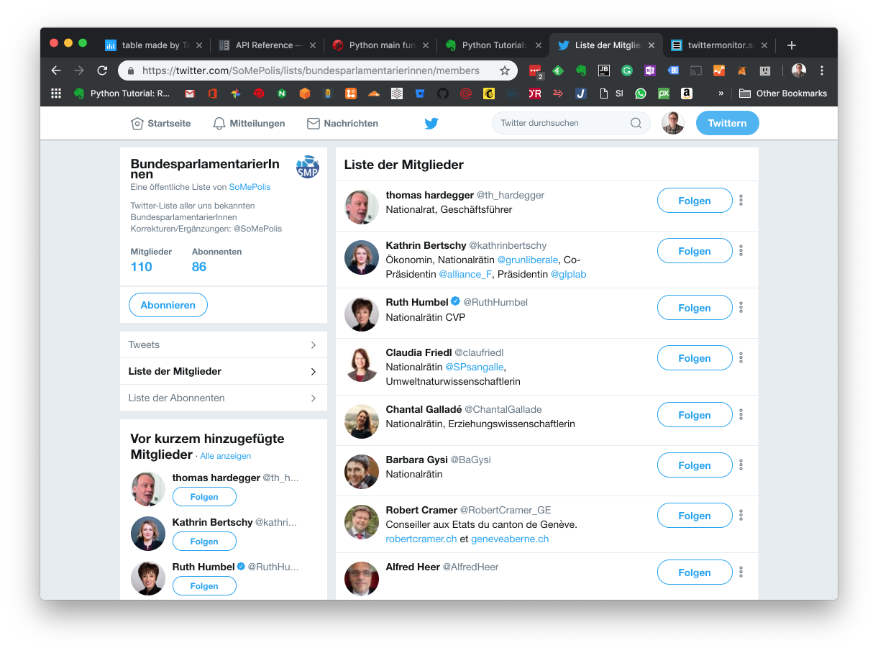
The goal of the program is to fetch all list members (government members who are tweeting) and extract some key figures (followers and friends)
Create a Twitter Developer Account and App
To fetch data via the public Twitter API, you have to register your application via the site
https://developer.twitter.com
. You have to describe the purpose of your application. The approval process may take one or two days.
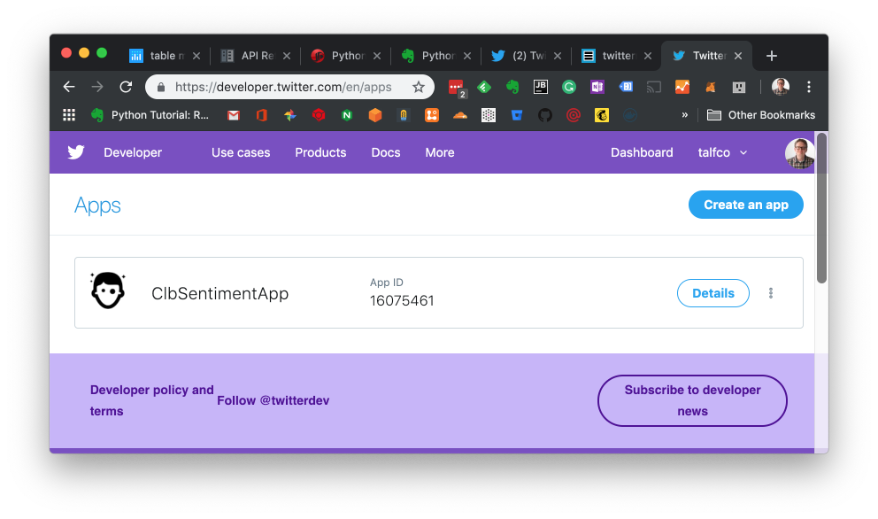
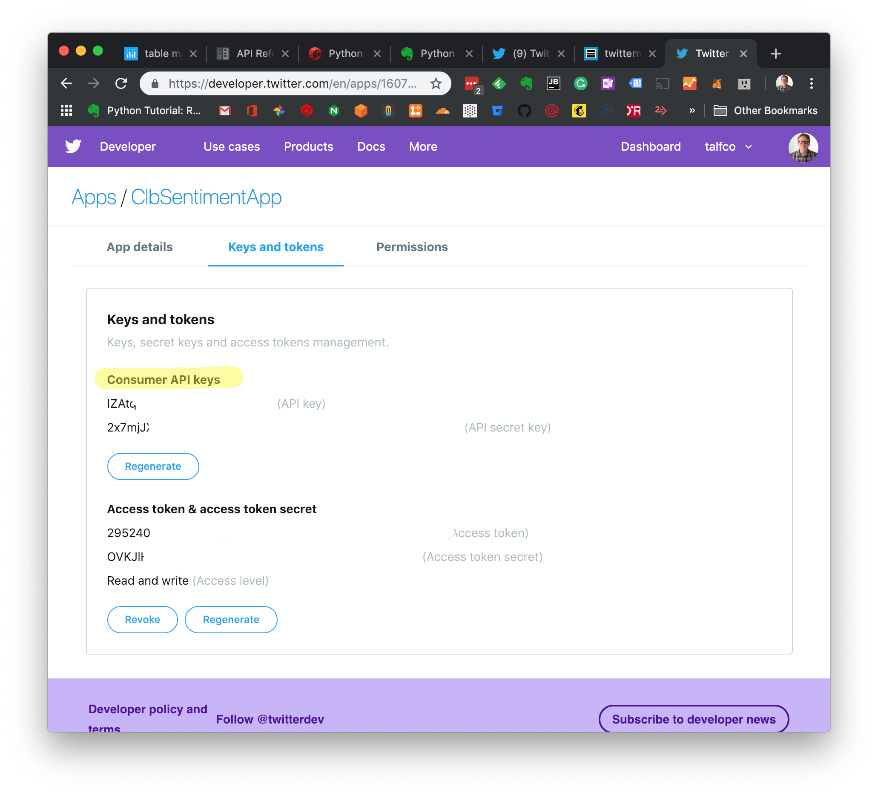
After the confirmation, you then create your first App in your developer account.
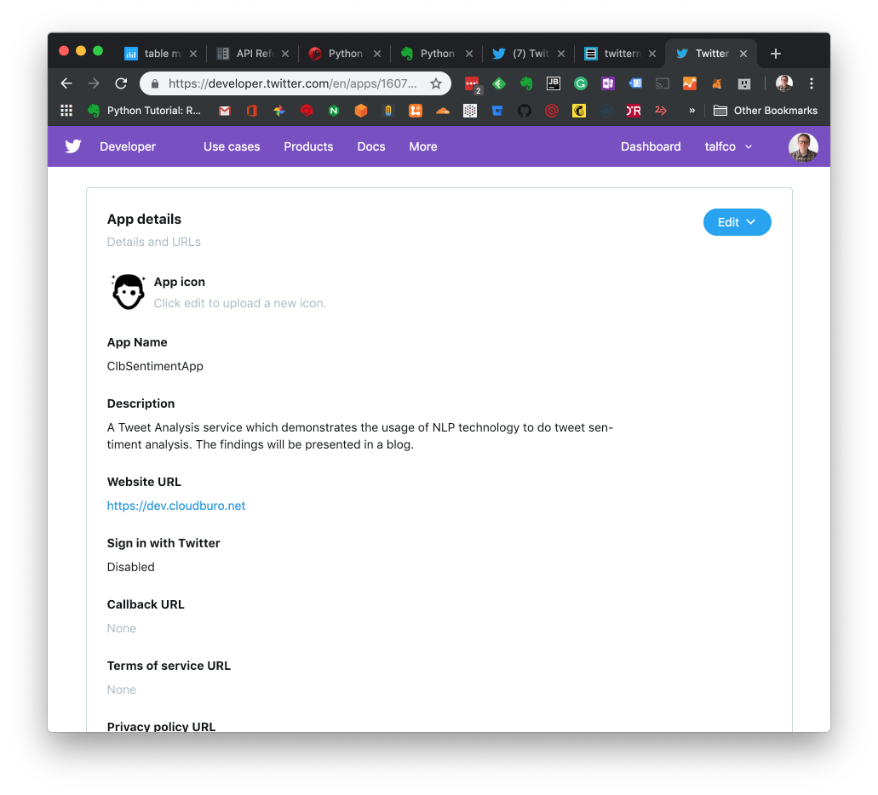
Having done that, Twitter will generate API keys and tokens which you will use in your program to communicate with the Twitter API.
Write the Program
It’s time to write the program.
We will create a class
TwitterClient
which offers two methods
get_government_members
and
create_plotly_table
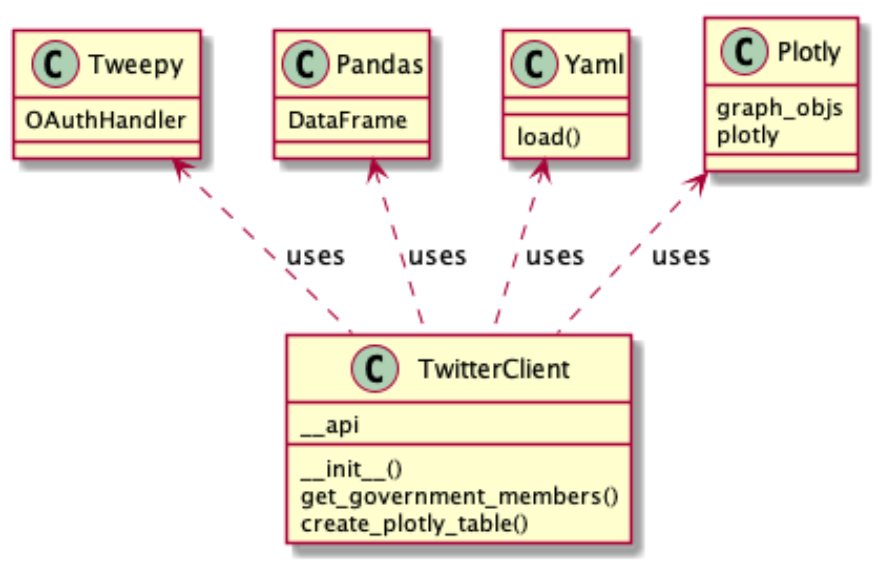
The program will use the following python packages
-
tweepy: will provide access to the Twitter public API
-
yaml: is a parser which can read yaml configuration files (used to store our secret keys)
-
pandas: is a library providing high-performance, easy-to-use data structures, and data analysis tools
-
plotly: is a graphing library which makes interactive, publication-quality graphs online.
That’s is by using these 4 libraries we are ready to go.
The Program
init
Within the Class initialization method, we have to establish a connection with the Twitter API.
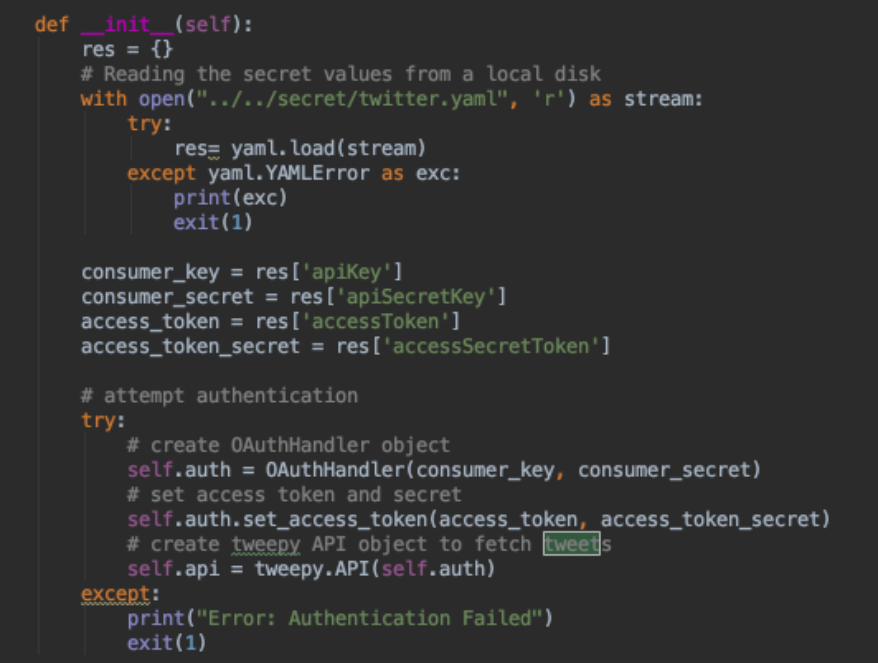
For that, we use our keys and tokens which are loaded from a yaml file, which is located outside of the current directory in the
secret directory.
with open("../../secret/twitter.yaml", 'r') as stream:
This is a common approach, to locate sensitive data in a directory which only lives on the local computer and never will be checked in a remote source system as Github.
Yaml is a human-readable data serialization language. It is commonly used for configuration files but could be used in many applications where data is being stored.
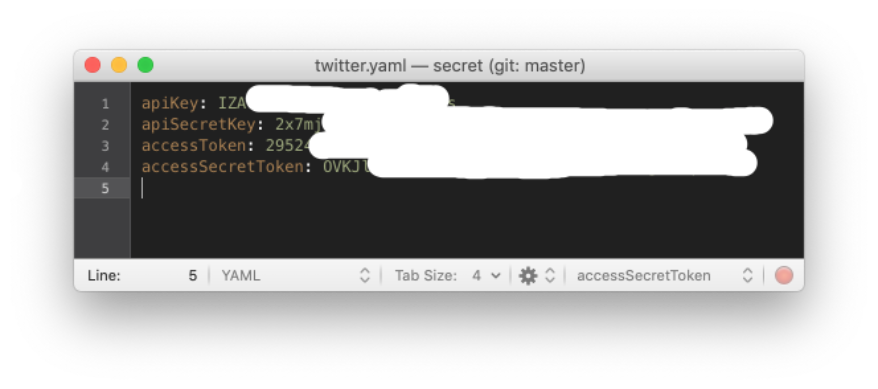
It has a straightforward syntax, for our case four
<key>:<value> pairs for the security tokens, which are loaded:
  consumer_key = res['apiKey']
  consumer_secret = res['apiSecretKey']
  access_token = res['accessToken']
  access_token_secret = res['accessSecretToken']
As a side information, when you enhance your program and require additional non-sensitive configuration data, you would introduce a second yaml file with public information, which you can check-in with the normal source code.
In the next step, we use
OAuth to authenticate with Twitter and gain access to their API. OAuth is an open standard for access delegation, commonly used as a way for Internet users to grant websites or applications access to their information on other websites but without giving them the passwords. I.e. you will provide them with your secret access token and keys.
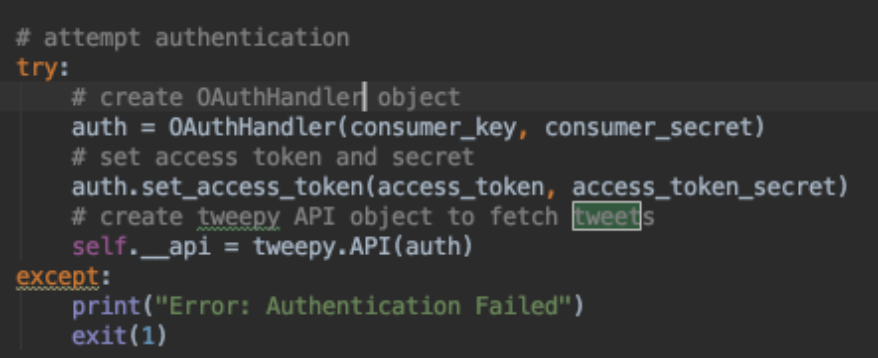
We create a private class variable
_api
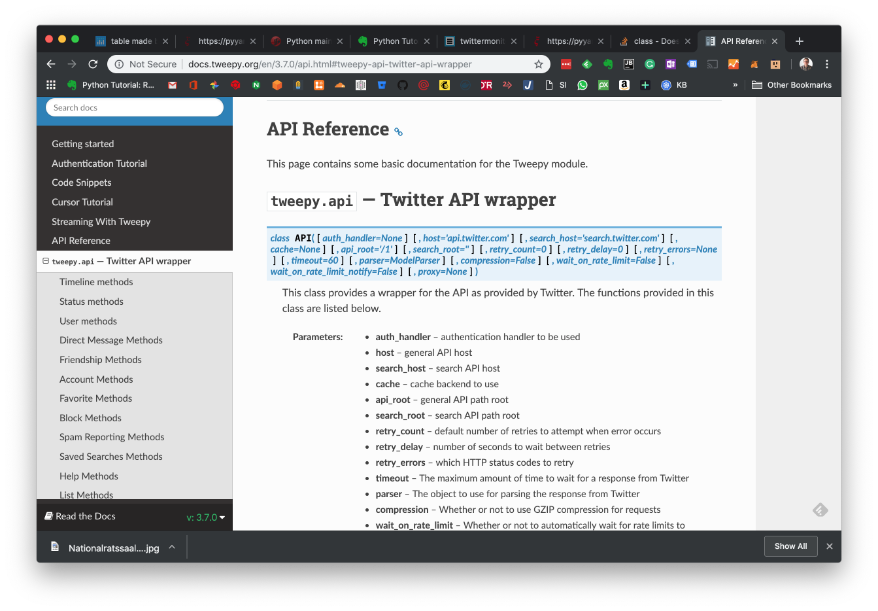
which holds the reference to the Twitter API. Via this reference object you can now interact with the Twitter API, all methods available are described
here
. We use a private variable for the API because we don
’
t want to offer the API directly to consumers of our classes but rather provide higher level methods as
getgovernment_members
.
Defining the scope of your class variables - public, protected, private - is an important design decision, when you are designing classes which will be used within a program or module.
You communicate via the __api reference with the Twitter server. All available methods can be found here:
http://docs.tweepy.org/en/v3.5.0/api.html
get_government_members
In this method, we will fetch all twitter politician accounts out of the above described list
BundesparlamentarierInnen of the twitter account
SoMePolis.
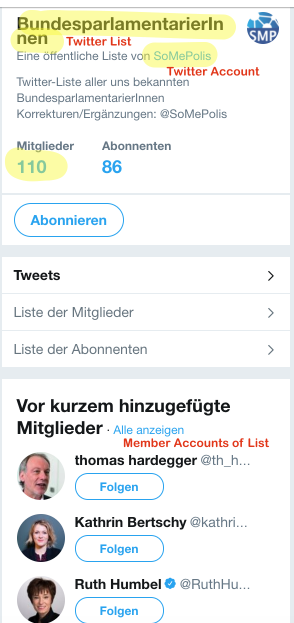
In a first step, we get all Twitters lists of the SomePolis account and search for the required one. Having found it we will use its
list.id in order to retrieve all members (twitter accounts) of the list.

In order to retrieve all members of a list we have to use a so-called
Cursor.
  for item in tweepy.Cursor(self.__api.list_members, list_id=list.id).items():
      result.append(item)
  return result
It’s an important concept in API interfaces in order to manage data retrieval of arbitrary large lists (i.e. a list may have millions of entries)
If you use in the program the following code sequence, you would just return the first 25 members of the list.
__api.list_members(list.id)
With this strategy, the Twitter API will ensure that it will not have to deliver huge data amount in a single request to a client program. In case you want all members you have to call multiple times the
list_members.
In each request a packet of 25 list member accounts will be returned. This concept is called “pagination” and is used throughout public API’s of various providers (you can find more information here:
Tweeply Cursor Tutorial
)
The list has about 110 members, that means the
list_members
method will be called five times. At the end, the
result
variable will have the 110 Twitter Accounts accounts.
create_plotly_table
Fi,nally we extract out of the list of twitter accounts certain data for further processing.
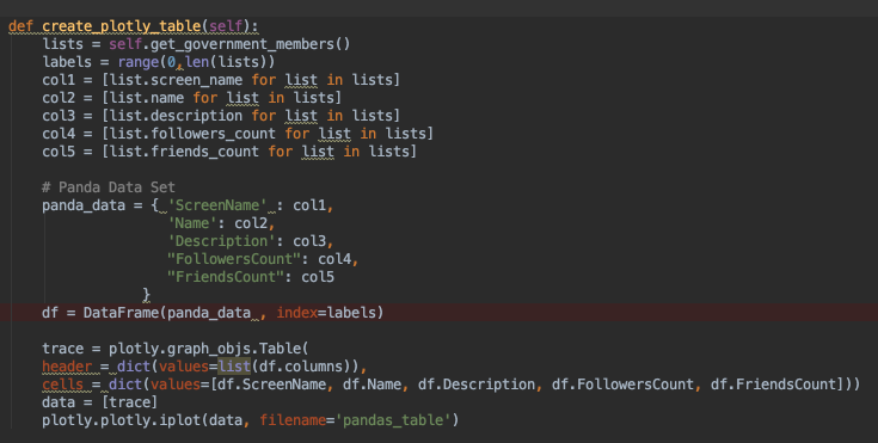
We will prepare a
Panda Dataframe
, which is a two-dimensional size-mutable, potentially heterogeneous tabular data structure with labeled axes (rows and columns).
Of our list of Twitter accounts we will extract
-
the screen_name, which is the @<twitterName>
-
the name, which is the normally the full name of the person
-
the description, which provides an additional description about the person
-
the followers_count, as well as the friends_count of the Twiitter account.
We have to create columns for the data frame which is achieved via the following command sequence
col1 = [list.screen_name for list in lists]
We iterate through our
lists
and extract for each record the
screen_name
.
Finally, we create a plotly
Table:
There are the two main modules that we will need in order to generate our Plotly graphs.
*
plotly.plotly contains the functions that will help us communicate with the Plotly servers
*
plotly.graph_objs contains the functions that will generate graph objects for us.
You will have to create an account at
https://plot.ly (when you first run the application, to which your generated table will be uploaded. As a result, you will get a table similar like this one in your account.

Account Creation at Plotly
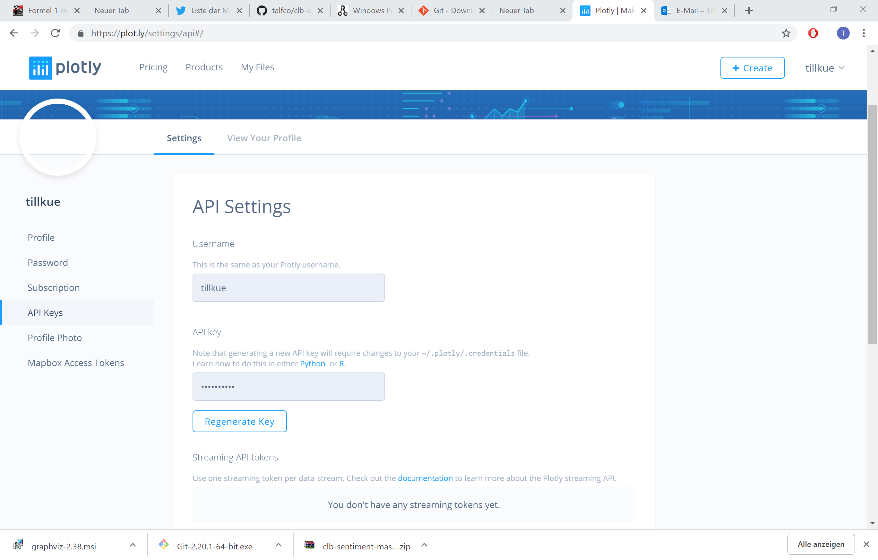
The first time you run the program, you will be asked to sign up and create an account at plotly.

Having created an account you will have to retrieve the access token (by creating a new one if necessary)
And store it in the file
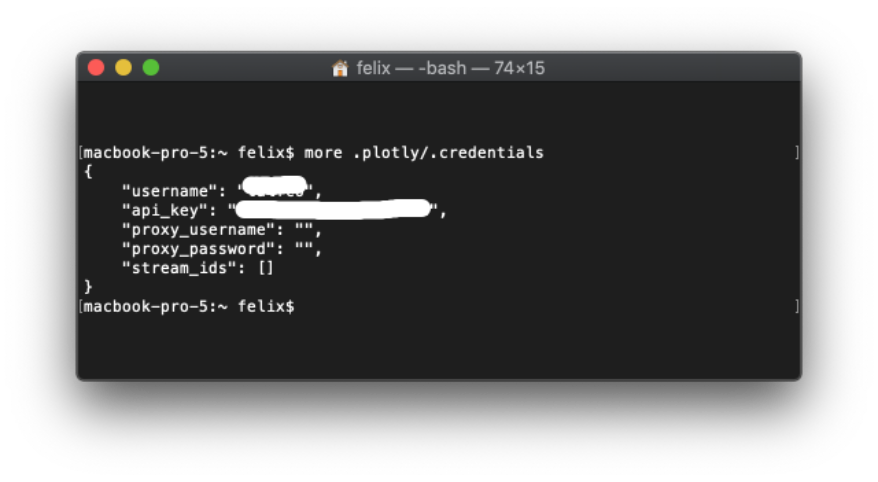
.credentials
in the home directory in the folder
.plotly
That’s it for today as an exercise try to add the following code sequence.
Exercise
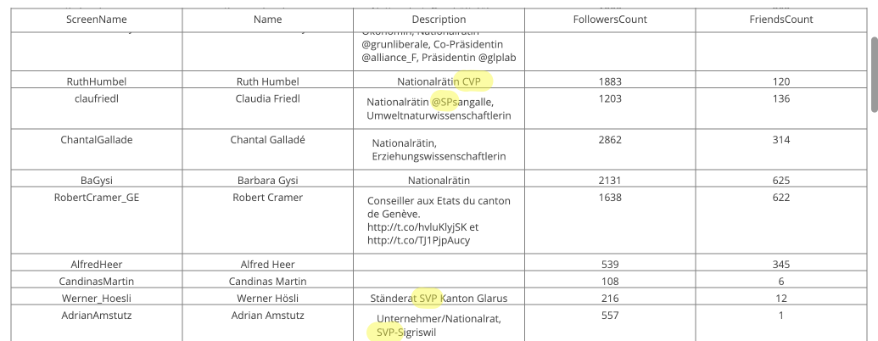
Try to identify the party of each government person, by anaylzing its
screen_name or
description. As a guiding help, check out the
following guide of parties in Switzerland. Main parties are “CVP”, “FDP”, “SP”, “SVP” as well as “Grüne”. There is a high chance that the abbreviation are mentioned by a person (see screenshot below).
So build up a new Panda Column and add it to the Data Frame for visualizing.
Source Code
The source code can be found here:
https://github.com/talfco/clb-sentiment
This blog entry was fully produced within Evernote and published using the
Cloudburo Publishing Bot
.
comments powered by Disqus