Java for Beginners #1 - Prepare an IntelliJ Maven Project
In this first session we create a Maven Project in the
IntelliJ Integrated Development Environment (IDE) and configure some aspects of the tool, which helps us in our future development work.
The goal of our project is to develop first a standalone Java Application and then an Android App, which allows us to retrieve and visualise football data from the API of
http://www.football-data.org/index
The goal of the football-data API is to provide football data of all major european leagues in a machine-readable way. By data I mean fixtures, teams, players, results and more. All this information is provided via an easy-to-use RESTful API in JSON (only) representation.
How Java Works
If you are completely new to Java, watch the following 6 minutes video
Some terminology to get you a better start off (taken over from
here).
- Computer program - A computer program is a set of instructions that tell a computer exactly what to do. The instructions might tell the computer to add up a set of numbers, or compare two numbers and make a decision based on the result, or whatever. But a computer program is simply a set of instructions for the computer, like a recipe is a set of instructions for a cook or musical notes are a set of instructions for a musician. The computer follows your instructions exactly and in the process does something useful – like balancing a checkbook or displaying a game on the screen or implementing a word processor.
- Programming language - In order for a computer to recognize the instructions you give it, those instructions need to be written in a language the computer understands – a programming language. There are many computer programming languages – Fortran, Cobol, Basic, Pascal, C, C++, Java, Perl – just like there are many spoken languages. They all express approximately the same concepts in different ways.
- Compiler - A compiler translates a computer program written in a human-readable computer language (like Java) into a form that a computer can execute. You have probably seen EXE files on your computer. These EXE files are the output of compilers. They contain executables – machine-readable programs translated from human-readable programs.
- Build Process - When you develop an application in a programming language (in our case Java) you will have a so-called Build Process which manages various steps. As we will see below, we will use a project management tool which helps us to manage this process. For example the process will
- compiles your Java source code then
- runs some test against the code and then
- bundles it in a Java JAR file for distribution.
Using Maven for the Build
We are setting the project in IntelliJ as an
Apache Maven Project up.
Maven is a professional software project management tool and it’s primary goal is to allow a developer to comprehend the complete state of a development effort in the shortest period of time. By using it from the beginning, we can grow our project easily over time. You don’t need to know the all the details from Maven, just follow the setup steps as shown below. Over time we will introduce the necessary concepts of Maven.
For each Maven Project you have to define a “groupId", an “artifactId”, as well as a “version” (see details
here)
- groupId will identify your project uniquely across all projects.
- artifactId is the name of the jar (the file which holds all the compiled java code) without version.
- version identifies the current version of the jar.
When Maven is compiling and building your Java Application, it will bundle the generated the files in a jar file by using the above definitions for its file name. So let’s start then and get an IntelliJ IDEA Project setup.
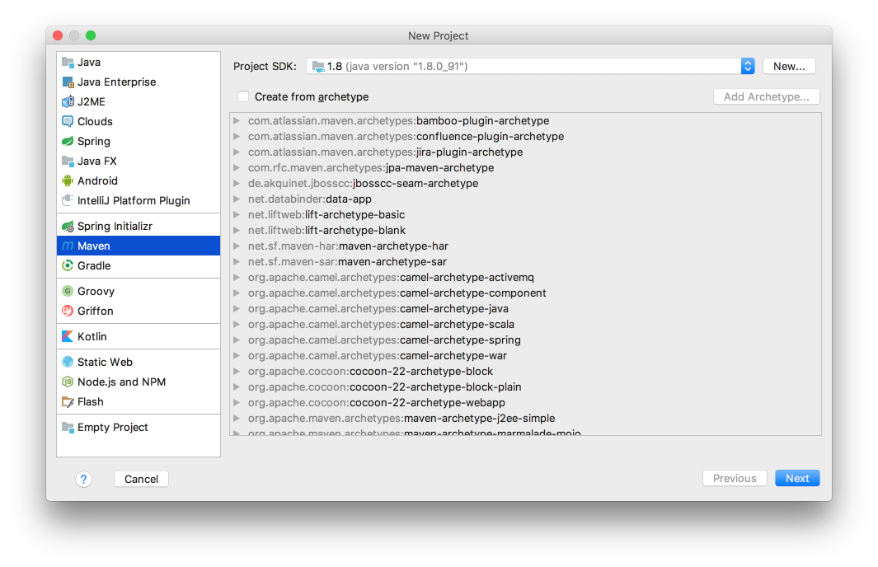
Step 1: Create a new Maven Project in IntelliJ IDEA
From the menu select: “File->New->Project"
You don’t require an archetype, just press “Next"
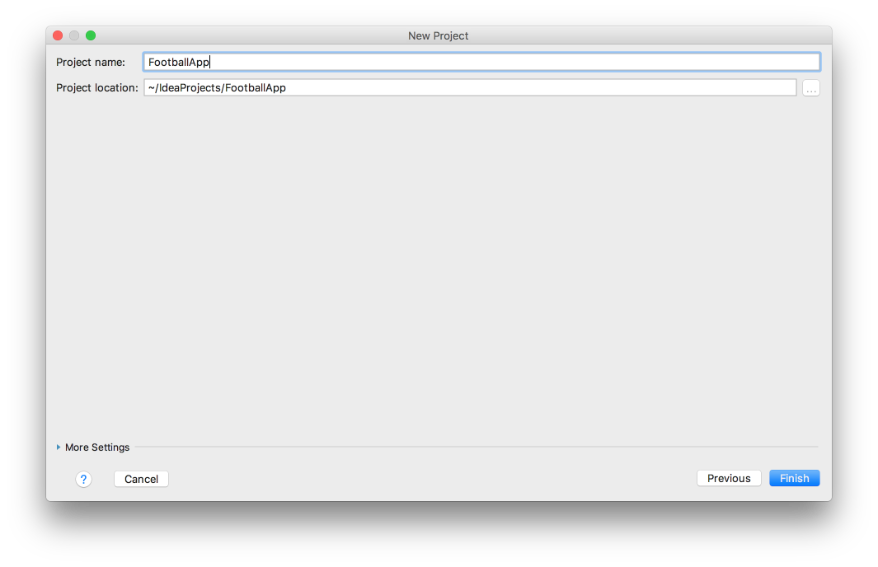
Maven requires the following information (more to it later)
- “GroupId”, for example com.<yourName> (if you own a domain name use this one)
- “ArtifactId”, in our case “FootballApp”
- “Version”, leave it as suggested.
Press “Next"

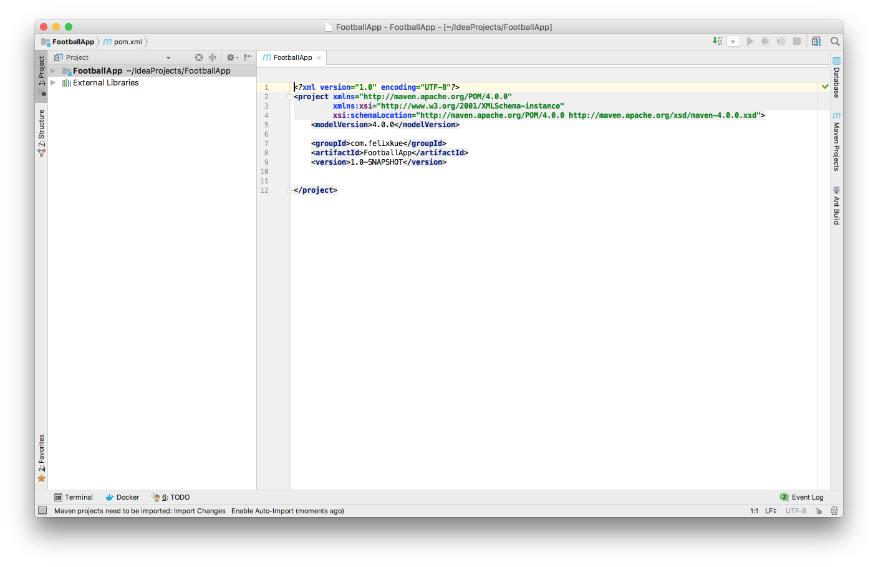
The IntelliJ “Project name” and “Project location” will shown, leave it as is and Press “Finish"
The Project will now be opened and the Maven “pom.xml” File will be shown. We will explain it in the next session.
Step 2: Configure the IntelliJ IDEA Project View
Now we do some IntelliJ Project and View configurations.
First we open the Event Log. Click on the rectangular icon at the bottom left of the Project Window
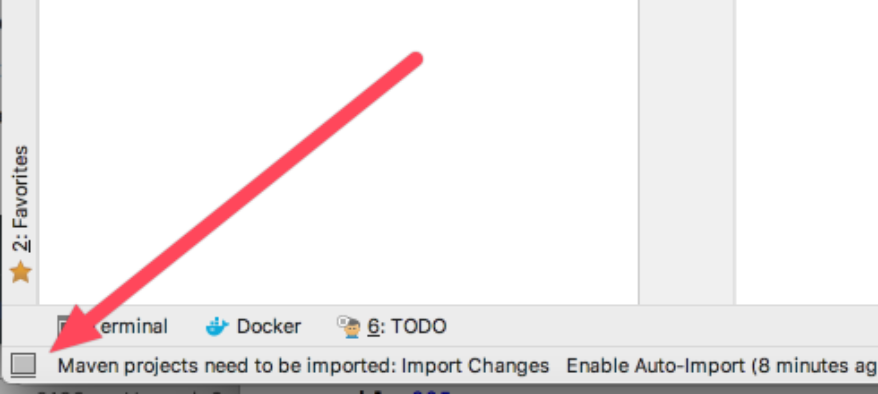
A list of possible views will be shown, select the “Event Log”, by clicking on it.
The Event Log is now shown at bottom of the Window.
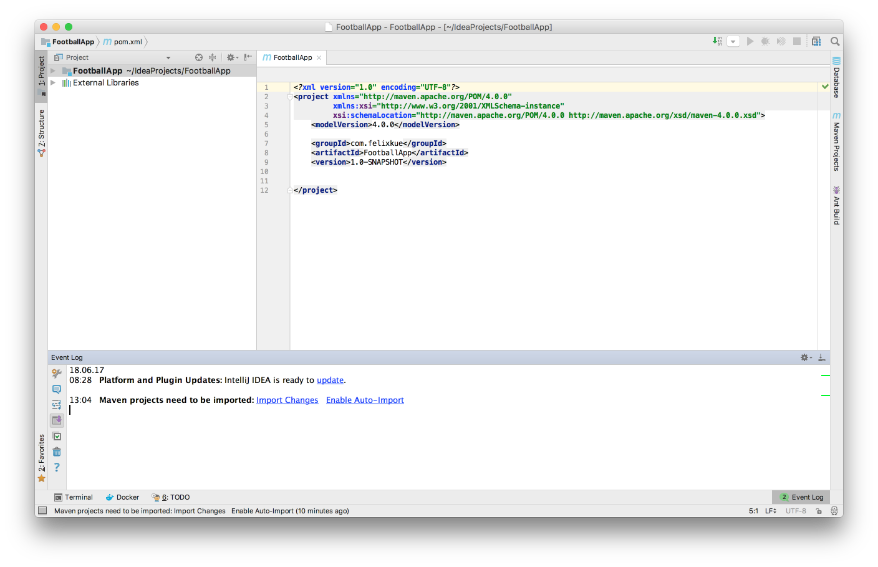
A Message is displayed “Maven projects need to be imported …”.
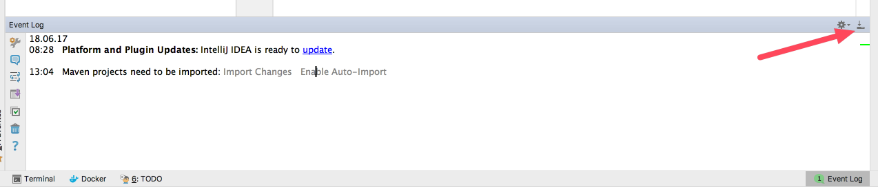
Click on “Enable Auto-Import”, so that any extension of the Maven pom.xml will be automatically imported.
After clicking it, the entry is greyed out.
You can hide the “Event Log” window by clicking on the icon in the upper right corner of the Event Log Window. But for now leave it open.
Step 3: Configure the Auto Build Feature of the Project
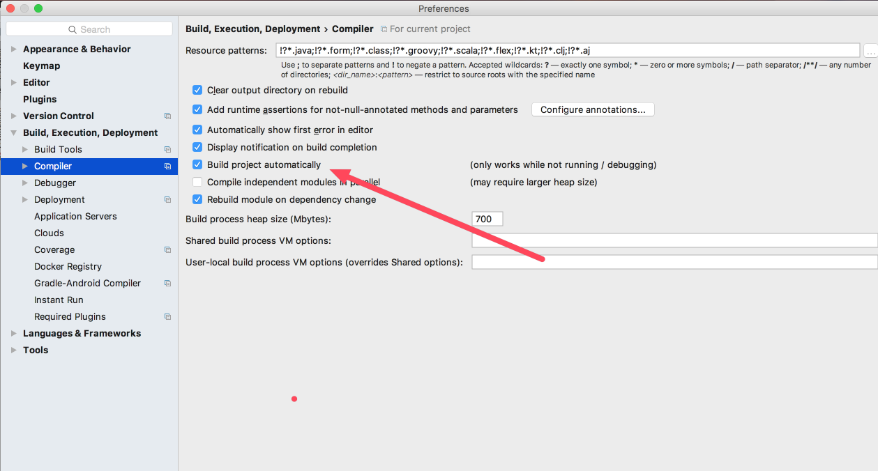
In order to enable the “
Problems Tool Window” you have to enable the “Make project automatically” option. Select the following menu
- “IntelliJ IDEA->Preferences->Build, Execution, Deployment ->Compiler” on a Mac or
- “File->Settings->Build, Execution, Deployment->Compiler” on Windows or Linux.
- Click “Build project automatically” to enable it.
That’s it for today, in the next session, we will finalize the project-setup and dive into the concepts around RESTful API’s which allows us to fetch data from the
football-data.org site in a machine-readable format.
Further reading
- Read Chapter 1. Dive in A Quick Dip: Breaking the Surface of the Head First Java Book
This blog entry was fully produced within Evernote and published using the
Cloudburo Publishing Bot
.
comments powered by Disqus